Shadowrocket
Legacy guide: screenshots and helper-tool steps may differ from the current product.
This is an English translation of a legacy guide. For the original wording, read the Chinese original.
Setting up a Proxy302 proxy in Shadowrocket requires a connection that can access the overseas internet. If you do not have one, please refer to the Connection Tutorial for Non-Overseas Environments; if you already have that access, please refer to the Connection Tutorial for Overseas Environments.
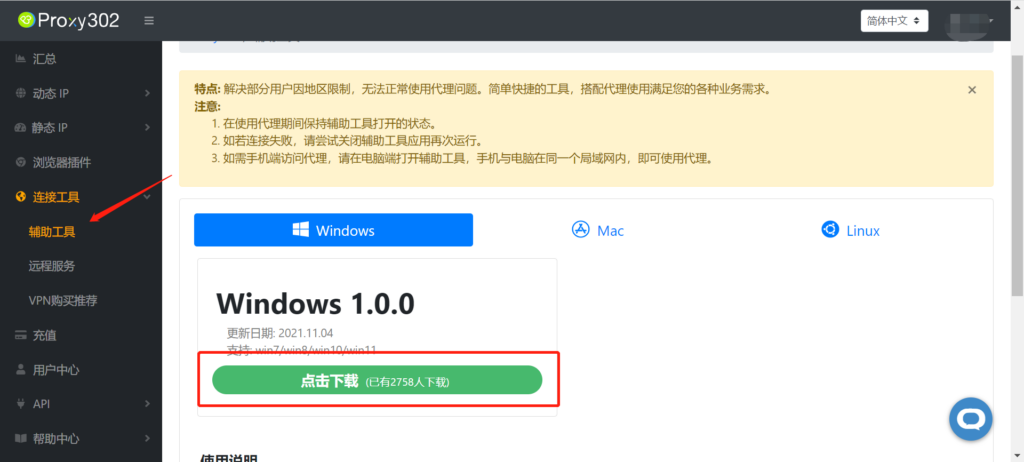
Connection Tutorial for Non-Overseas Environments1. Log in to Proxy302 and download the [Auxiliary Tool].
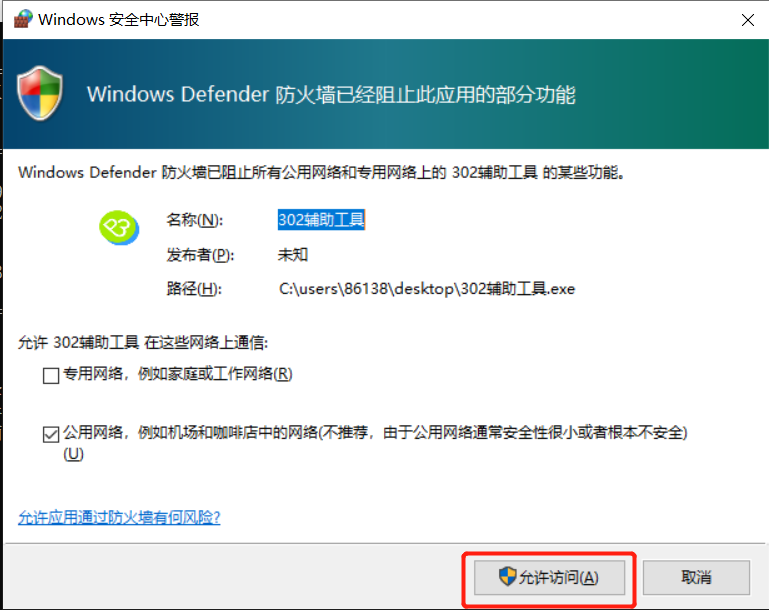
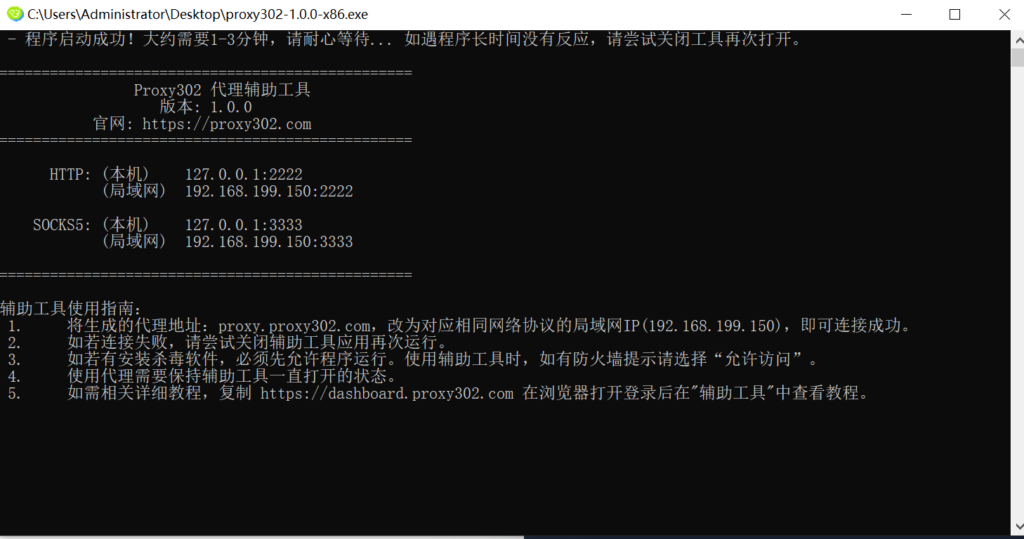
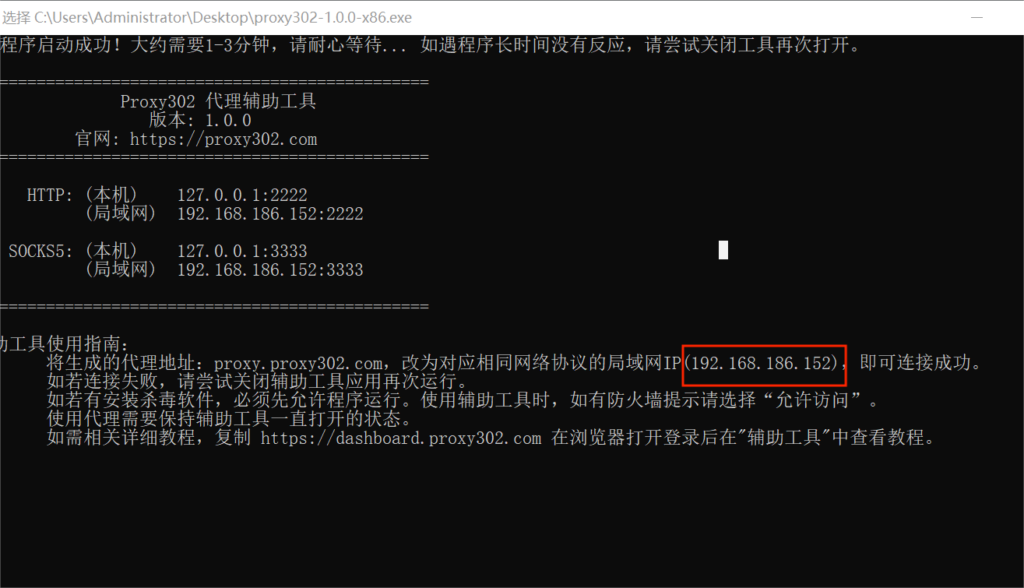
2. Open the [Auxiliary Tool] (if a firewall appears, select allow access).
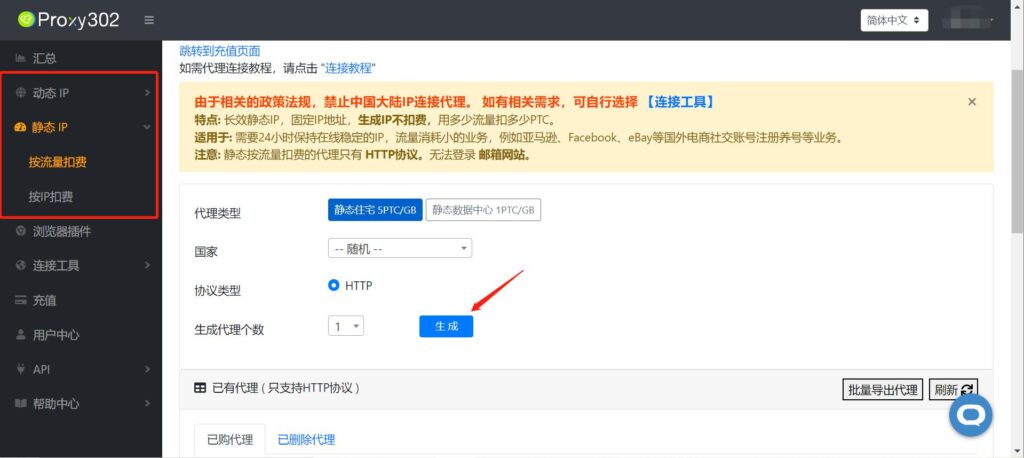
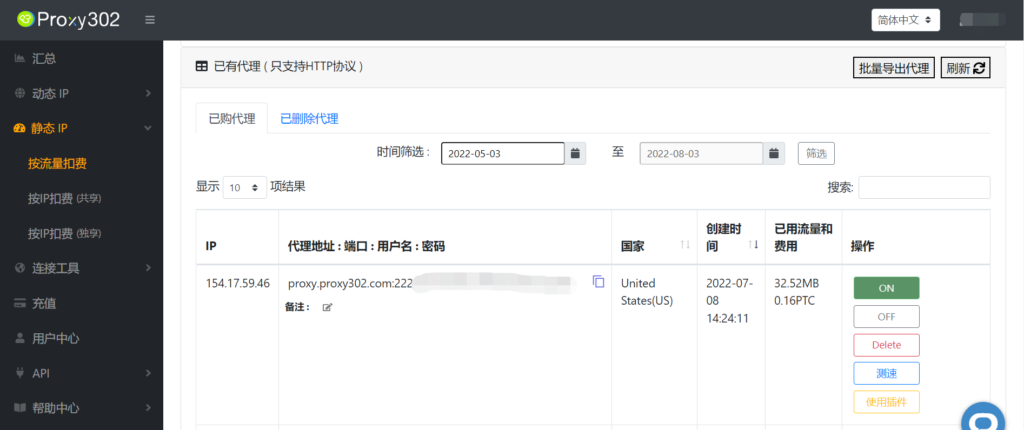
3. Log in to Proxy302 to generate a proxy.
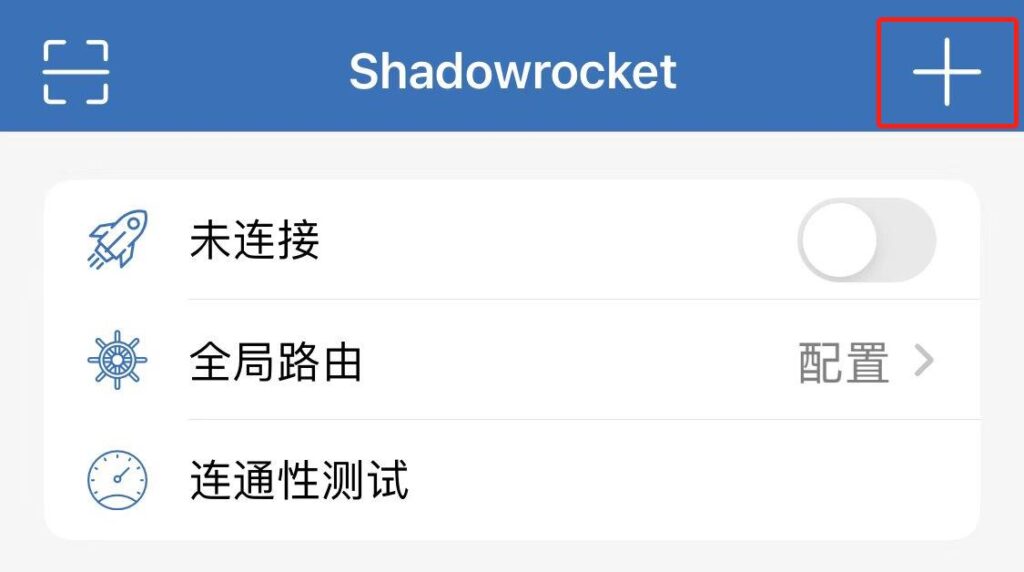
4. Open Shadowrocket and tap the "+" icon in the top right corner.
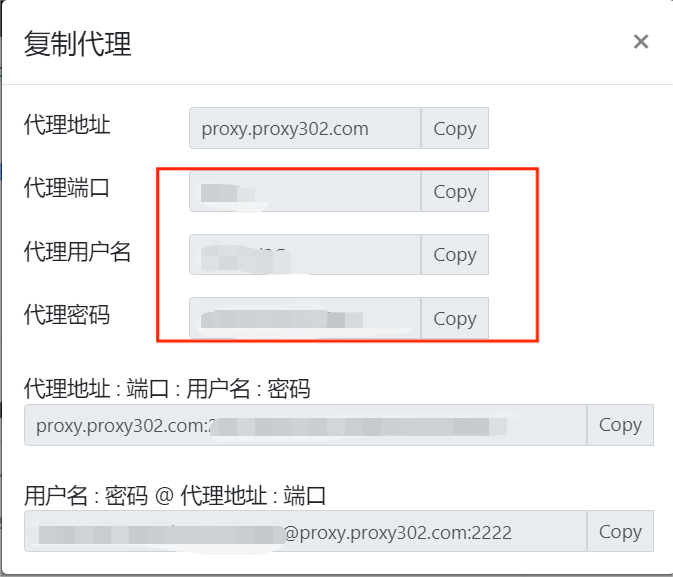
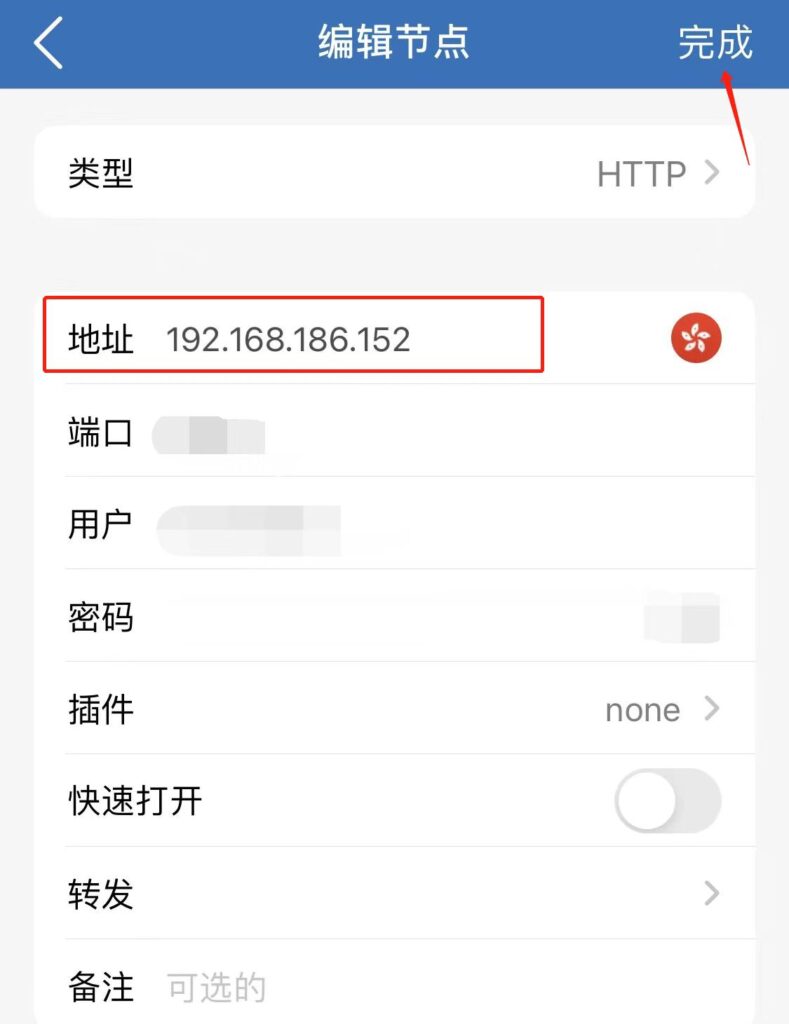
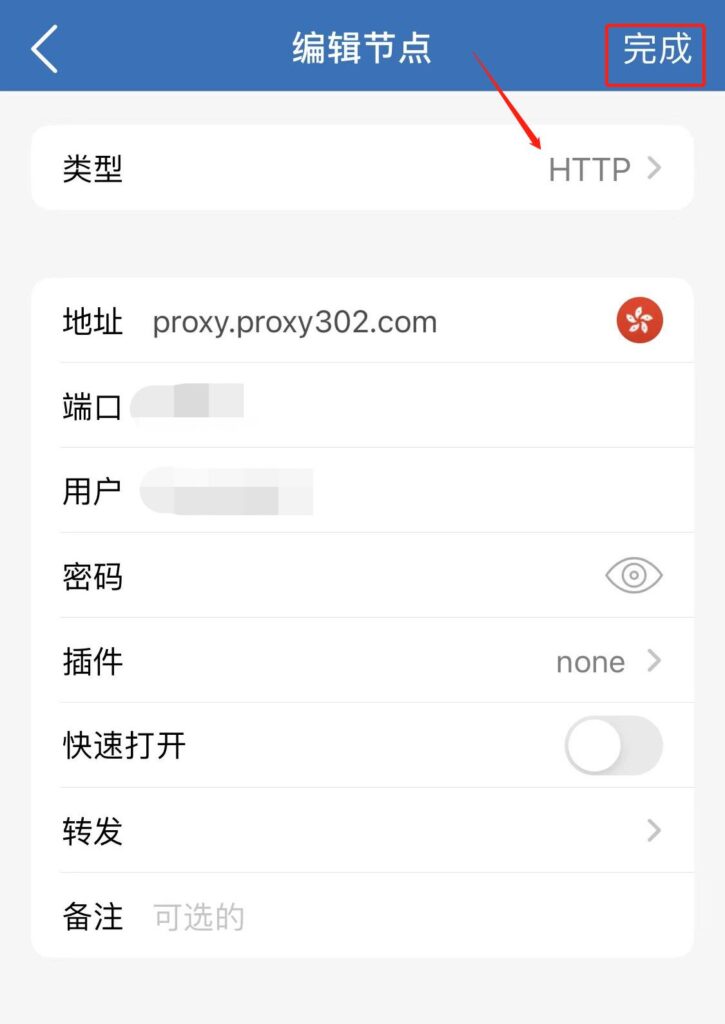
5. Return to Proxy302 to copy the generated IP information. Select "HTTP" as the type, enter the generated IP information, change the address to the LAN IP found in the Auxiliary Tool, and tap Done to save the settings.
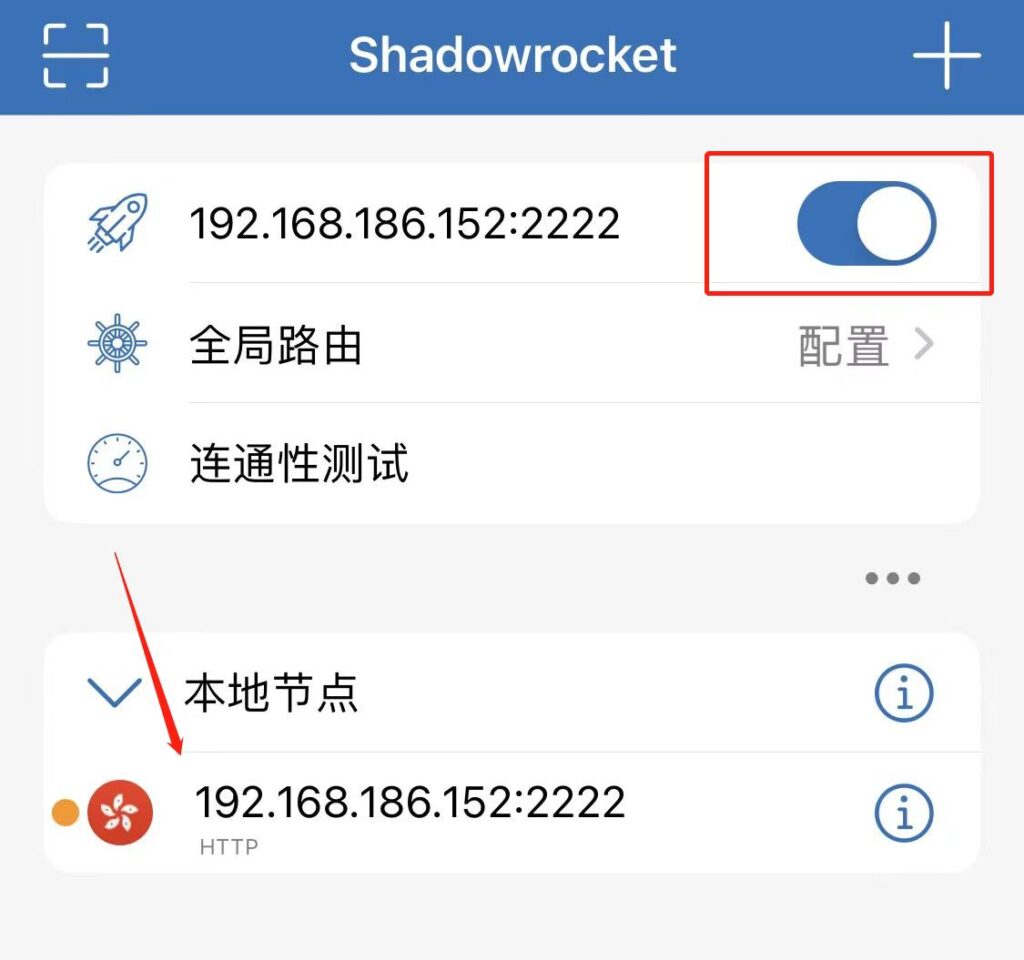
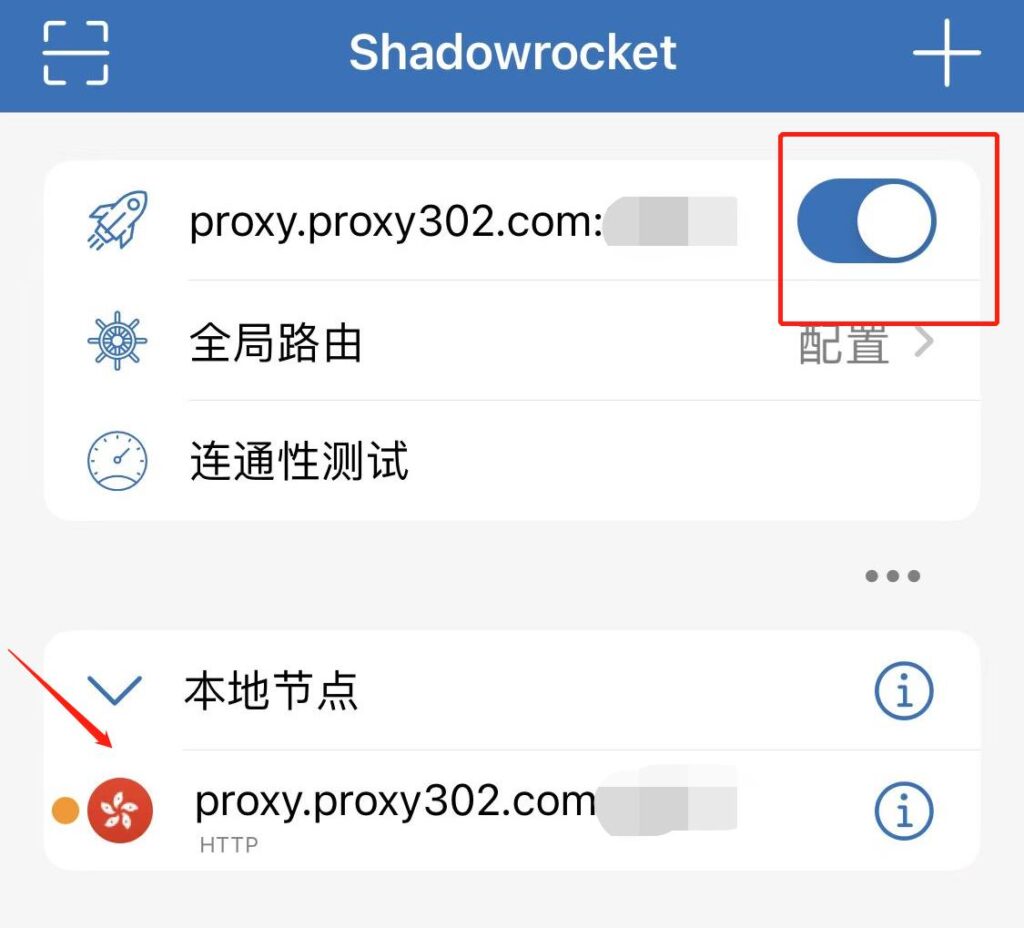
6. Select the added node and toggle the Shadowrocket connection switch to connect to the proxy IP.
7. Once you have confirmed the proxy is set up successfully, visit http://ipinfo.io. If the IP address on the page matches the proxy IP you set, the proxy is configured successfully.
Connection Tutorial for Overseas Environments
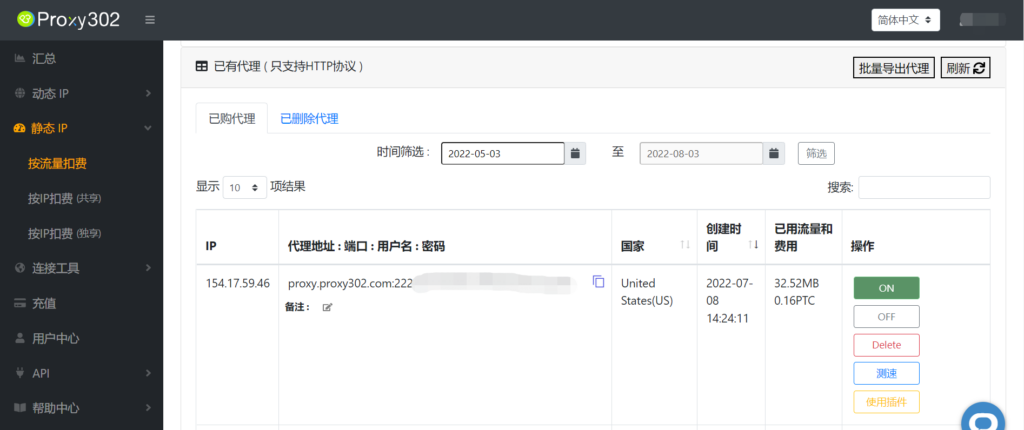
1. Log in to Proxy302 to generate a proxy.
2. Open Shadowrocket and tap the "+" icon in the top right corner.
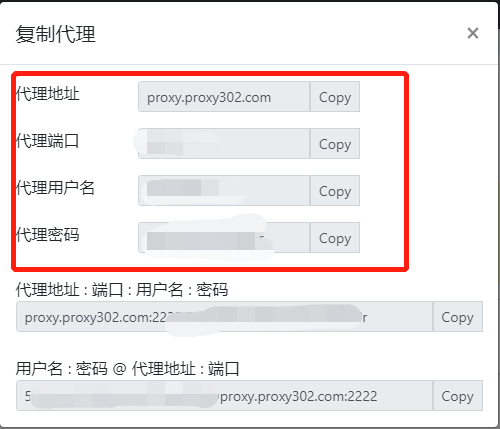
3. Return to Proxy302 to copy the generated IP information. Select "HTTP" as the type, enter the generated IP information, and tap Done to save the settings.
6. Select the added node and toggle the Shadowrocket connection switch to connect to the proxy IP.
7. Once you have confirmed the proxy is set up successfully, visit http://ipinfo.io. If the IP address on the page matches the proxy IP you set, the proxy is configured successfully.